
Blogs
How To Use Toggle Bolts On Drywall And Plaster Walls

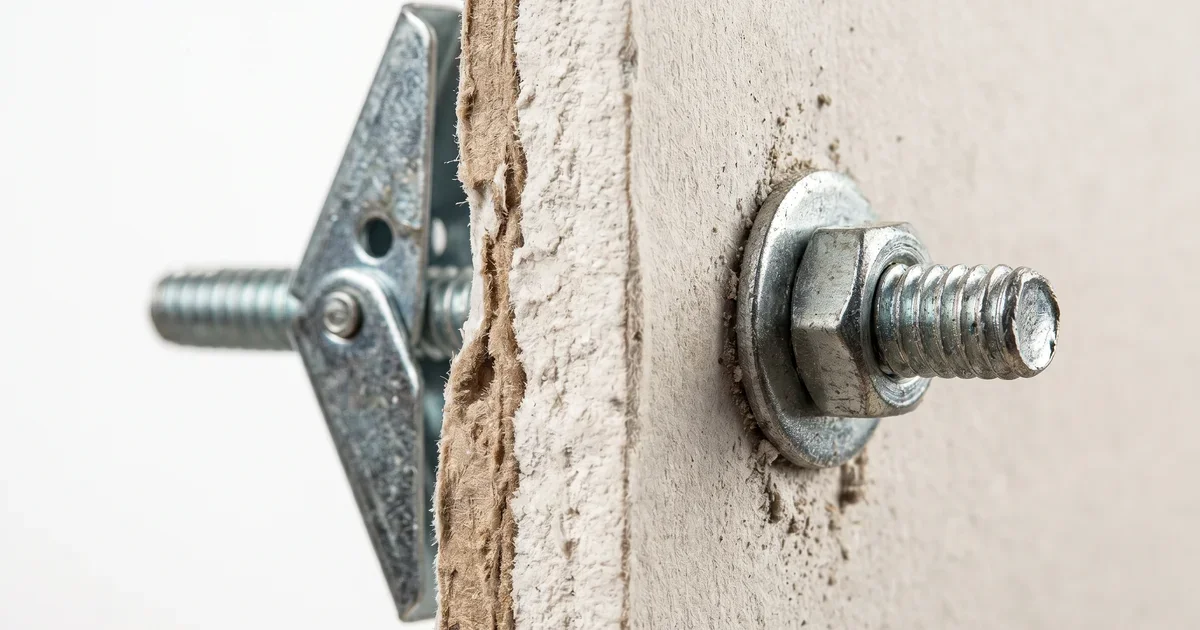
You’ve got something heavy to hang, and there’s not a stud in sight. Sound familiar? That’s exactly the situation toggle bolts were built for. They’re one of the strongest hollow wall anchors you can use, and when installed correctly, they can hold surprisingly significant loads on both drywall and plaster walls.
The trick is in the installation. Done right, toggle bolts are rock solid. Done wrong, they spin, strip, and fail. This step-by-step guide walks you through everything you need to know so that whatever you’re hanging stays exactly where you put it.
What Are Toggle Bolts And How Do They Work?
Toggle bolts consist of two parts: a machine screw and a pair of spring-loaded wings (the toggle). The wings fold flat to pass through a drilled hole in the wall. Once through, they spring open on the other side. When you tighten the screw, it pulls the wings flat and flush against the interior face of the wall, spreading the load across a larger surface area rather than concentrating stress on a small drywall section.
This is what gives toggle bolts their strength. The larger the wings and bolt diameter, the more weight they can support.
When Should You Use Toggle Bolts?
Use toggle bolts when you need to mount heavy items on hollow walls, and a wall stud is not in the right location. They’re appropriate for mounting TV brackets, floating shelves, mirrors, cabinet supports, and ceiling hooks where loads exceed 40 pounds.
A standard 1/8″ toggle bolt can hold up to 50 pounds in 1/2″ drywall. A 1/4″ toggle bolt can handle up to 90 pounds. Some heavy-duty versions handle even more. Always check the package for the weight rating specific to your bolt size and your wall type.
What You’ll Need
The tool list for installing toggle bolts is short. You need: the toggle bolts themselves, a drill, the correct drill bit (the size is printed on the packaging), a matching screwdriver bit (usually Phillips), and, optionally, a stud finder to confirm there are no pipes, wires, or framing behind where you plan to drill.
Step 1: Check Behind The Wall
Before you drill anything, check behind the wall for electrical wires, plumbing, and studs. You need a hollow space behind the drywall for the toggle wings to open. Many stud finders also detect electrical wires. If you see an unexpected reading, it may indicate a pipe rather than a stud. Never skip this step. Drilling into a live wire or a water pipe creates far bigger problems than any mounting job is worth.
Step 2: Mark And Drill Your Hole
Measure carefully and mark your hole location precisely. Use a level on your drill, so the hole goes in straight, not angled. Drill the correct-sized hole for your toggle bolt. Too small, and the folded wings won’t fit through. Too large, and the wings may fall through without deploying. The drill bit size is always printed on the toggle bolt packaging. Follow it exactly.
Step 3: Thread The Bolt Through Your Item First
This step trips up a lot of people. You must separate the toggle bolt into its two pieces before installation. Thread the screw through the item you’re mounting first: the bracket, shelf hardware, or whatever you’re attaching. Then reattach the toggle nut to the end of the screw. If you forget this step, you’ll have to remove the entire toggle from the wall to start over, and unlike many wall anchors, toggle bolts cannot be reused once deployed behind the wall.
Step 4: Push The Toggle Through The Wall
Pinch the wings together and push the assembled toggle bolt through the hole in the wall. You should hear the wings click open on the other side. Give the screw a gentle tug to confirm the wings have deployed and are engaging the back of the wall. If you can pull it back out easily, the wings didn’t open properly.
Step 5: Tighten The Bolt
Here’s where most problems happen. Unlike regular screws, where you just drive the fastener in, toggle bolts require you to pull back on the screw while you tighten it. This keeps the toggle wings from spinning freely behind the wall. Pull the bolt head away from the wall with your non-dominant hand while driving the screw with your drill. Once you feel the toggle engage and stop spinning, you can tighten the rest of the way. Use a power drill first to get most of the tension, then finish with a hand screwdriver so you can make fine adjustments to leveling.
How To Remove Toggle Bolts
When you need to remove a toggle bolt, simply back the screw out while pulling against it. The toggle nut will fall into the wall cavity. This is how they’re designed to be removed. The toggle nut stays inside the wall permanently, which is normal. This means toggle bolts are single-use fasteners. Once removed, the bolt itself can be reused, but the wings must be replaced. Budget for this if you anticipate future adjustments.
Ready To Tackle Your Next Wall Project?
Now that you know how to use toggle bolts the right way, heavy items on hollow walls are no longer a problem. For all your fastening hardware needs, including threaded rods, U-bolts, J-bolts, and specialty fasteners, Stelrod Mfg in Ontario is ready to help. Browse our product range or get in touch today to get the right parts for your project.